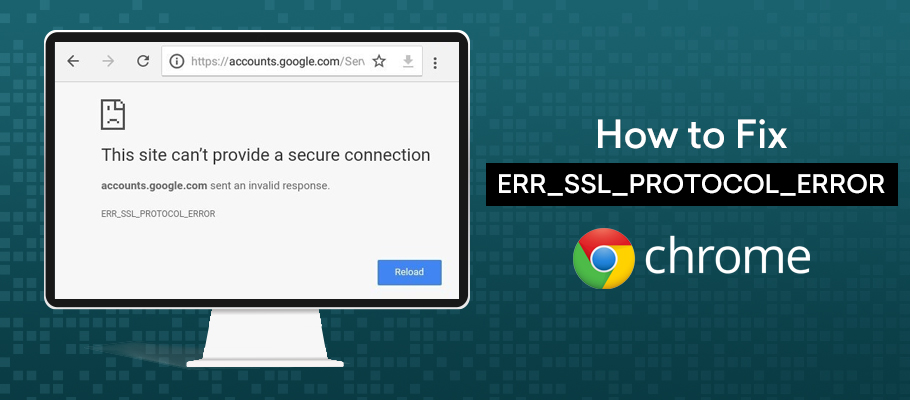
A quick guide to fix the ERR_SSL_PROTOCOL_ERROR on Google Chrome.
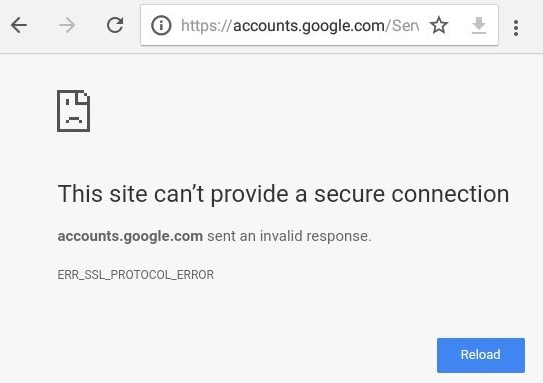
When your website fails to provide a secure connection, it shows ERR_SSL_PROTOCOL_ERROR in the Google Chrome browser, and there are some ways you can fix it.
What is ERR_SSL_PROTOCOL_ERROR on Google Chrome?
The misconfiguration of an SSL certificate can cause ERR_SSL_PROTOCOL_ERROR. The browser shows a message of such error due to rejection of connection to an SSL enabled website.
Mostly this error occurs due to server issues and a lack of client authentication. There are some other reasons for this error as well for this error.
But do not worry, if you are facing this issue then you are not alone, and it can be fixed easily.
Come to think of it, ERR_SSL_Protocol_Error is not even such a drastic issue to worry over.
In this article, we will discuss some quick ways to help you fix ERR_SSL_PROTOCOL_ERROR on Google Chrome right away, without any hassle.
Why ERR_SSL_PROTOCOL_ERROR Error Happen?
There are many reasons for not connecting with the server or any website. However, we cannot always find all the reasons behind this.
Some of the most common reasons for this error are:
The main trouble occurs when it remains even after reloading the page or clearing the cache. You cannot ignore this error, but you can eliminate it from Google Chrome.
Lets discuss step by step guide to fix ERR_SSL_PROTOCOL_ERROR easily.
How to Fix ERR_SSL_PROTOCOL_ERROR?
Let’s discuss these steps in detail below to remove this error from Google Chrome.
1. Make Sure SSL is Installed on Your Website
Installing an SSL certificate is essential to enable HTTPS (hypertext transfer protocol secure) on your site. In the absence of an SSL certificate, if https is forcefully enabled on the site, it will not only make your site inaccessible but also display the err_ssl_protocol error.
HTTPS in the address bar and a tiny padlock in the URL is a confirmation stating that the site has an SSL certificate installed on it. Clicking the padlock and seeking more information will display the SSL certificate details.
If the site is on HTTP (hyper-text transfer protocol), there will be no padlock and an SSL security certificate will be missing. You need to buy an SSL certificate before enabling https.
Many SSL certificate providers offer varied types and validations of SSL certificates. Follow the below-stated tips for better selection:
Tips
Go for a Legit and Reliable SSL Certificate Provider
Ensure that you purchase the SSL certificate from a reliable and trustworthy SSL certificate provider for better security and legitimacy. Check out the user reviews and the legitimacy of the service provider before concluding the purchase.
Choose your Type & Validation:
Once your SSL certificate provider is finalized, choose the type of SSL and the validation of SSL required for your website.
Example: A wildcard SSL certificate secures multiple first-level sub-domains along with the root domain.
Check out the Warranty & Support:
Always prefer a company which offers a good warranty in case of any dissatisfaction. As far as customer support is concerned, go for a company whose support team is available 24/7 to resolve your queries.
Watch your Budget:
It is important to think about SSL certificate cost as there are many providers available in the market. And they have their own advantages and policies. So, always think about what you need and choose a budget-friendly SSL certificate. Do not overspend mindlessly.
Process to Obtain an SSL Certificate:
Generate CSR (Certificate Signing Request):
Fill in all the details like the domain name of the site, the company’s name, address, contact details, etc.
Decide the Type of SSL:
Decide which SSL certificate is required for your site and select the Certificate Authority (CA) from which you need to buy this digital certificate.
Submit your CSR Request:
Submit the CSR request with all the details to the Certificate Authority (CA).
Wait for Positive Validation by the CA:
The CA will verify the details and after positive validation will issue the SSL certificate.
Install the SSL Certificate:
After receiving the SSL certificate, install the same on your site.
2. Force HTTPS Connection on your Website:
After the successful installation of an SSL certificate on your site, you need to forcefully enable your site to https to show your customers that it is secured with SSL encryption security.
If https is not forced, then it may also trigger the above-stated error.
After taking a full site backup, switch your site from http to https to eliminate error displays.
Steps #1: In the hpanel > Click on SSL
Steps #2: All the SSL certificates installed on the website will be visible here. Click “Manage”.
Steps #3: Select the desired domain name that you wish to configure and click “Force HTTPS.”
Varied hosting providers have different control panels and hence the above-mentioned steps may differ slightly.
Other Methods:
- In the WordPress root directory, go to the .htaccess file and edit the code to force https.
- Use the WP plugin “Force HTTPS”
Ensure that the site DNS settings are correct and if required use the DNS checker tool to verify the same. Improper DNS settings can link the SSL certificate to a false/fake domain name and can trigger the above-stated error.
If such a problem persists, uninstall the SSL certificate, and re-install it again to eliminate the error display.
3. Sync the System Date
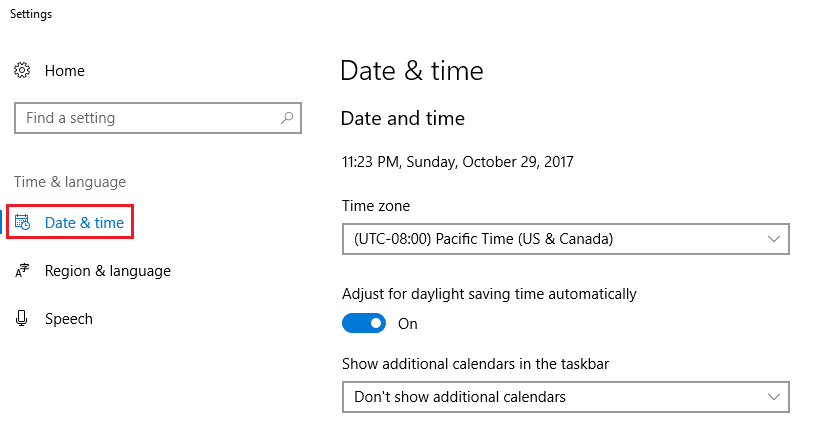
The most common reason for this ERR_SSL_PROTOCOL_ERROR is the incorrect date on your system. The date of your system should always be synched with the date of the website’s server.
When the system date is not synced with the server date, then you might expect the ERR_SSL_Protocol_Error to occur. This situation can easily be fixed by adjusting the date of your system.
You can adjust it manually or auto-sync the date and time with the internet.
Now, after fixing the date and time issue, reload the website, and you will see this error disappear.
4. Clear the Cache of the Browser
If you know about IT stuff or are aware of the web development know-how, then you must already know about the cache of the browser.
Web developers are aware of the situation that CSS changes do not reflect if the cache is not clear.
The process of removing cache is exceedingly simple, as mentioned below:
Step #1: Press Shift, Ctrl, and Delete
Step #2: Set “AA Time” in the time range section
Step #3: Skip browsing history checkbox and select rest all
Step #4: Press Enter
Now, the cache is cleared, and you can check whether the issue is fixed or not by reloading the page.
5. Delete Hosts File or Restore to Default
You can restore the host file in two different ways.
First, it can be done by downloading the host file store tool. This tool will fix the ERR_SSL_Protocol_Error automatically in the web browser.
The second method entails creating the host file manually.
You will find the host file at the following location:
“C:\Windows\System32\drivers\etc\.”
This file sometimes gets infected and thus shows incorrect information. Delete this host file and update it with the correct code. This will help you eliminate the ERR_SSL_Protocol_Error quickly.
6. Clear the SSL State of the System
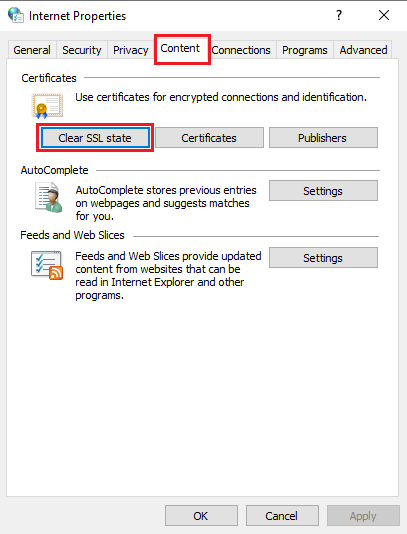
Clearing the SSL state of the system can also help you remove this issue quickly.
Here are the simple steps to clear the SSL state:
Step #1: Open Google Chrome settings by clicking on the three dots that appear on the top-right side of the browser.
Step #2: Then, from the navigation menu, select “Settings” on the top-left side corner of the screen. Next, select the “System” option from the advanced drop-down menu.
Step #3: Now, click on the “open proxy settings” option and a new window of Internet Properties will pop-up.
Step #4: Finally, select the “Clear SSL State” option by navigating the Content Tab.
Now, reload the website, and you will witness that the issue has now disappeared.
7. Adjust Antivirus Settings
Navigate the antivirus settings of your system’s antivirus software. Since the navigation settings are different in all antiviruses, it is difficult to demonstrate the exact system of all antiviruses.
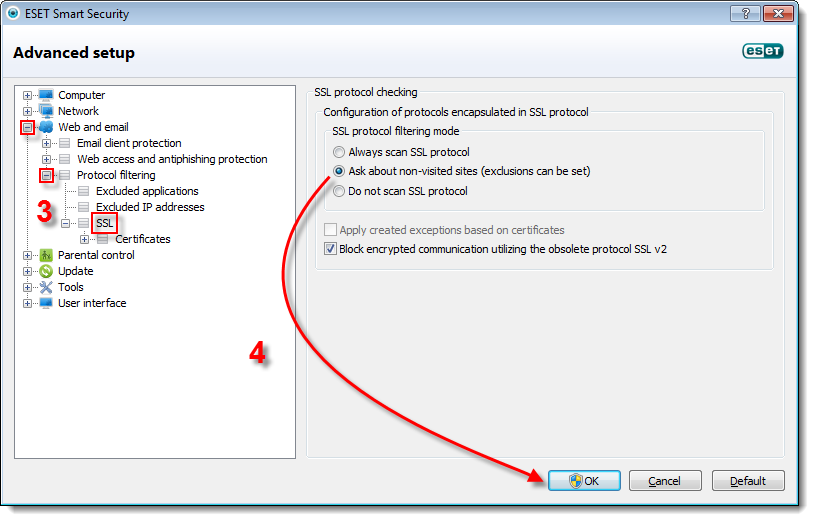
Simply check the setting of your antivirus and find the SSL protocol in the “advanced settings” option.
In the settings section, check whether the antivirus software is scanning the SSL protocols. If the antivirus software is scanning, then disable the feature and change it to “Ask about non-visited sites.”
Something like this:
However, if the error is still appearing, then set the settings back to default.
8. Disable the QUIC Protocol
QUIC stands for Quick UDP Internet Connections that created a secure connection to the server.
QUIC is almost the same as the TLS and SSL protocol and is always enabled in Chrome by default.
However, it sometimes conflicts with the SSL protocol of the websites and therefore displays the ERR SSL error message.
You can get rid of this by simply typing “chrome://flags/#enable-quic” in the address bar and press the “Enter” button.
Next, check the QUIC protocol on the top of the screen and disable it.
Now when you reload your website, you will see that the ERR_SSL_Protocol_Error has been duly eliminated.
9. Change Internet Security and Privacy Settings
Security of systems and information is a great concern for everyone while browsing on the internet.
Most internet users usually set their privacy and security level as “high.” However, this high level of security and privacy setting could sometimes block the SSL connection.
Here are the steps required to change the setting:
Step #1: Open Control Panel
Step #2: Navigate to “Internet Options”
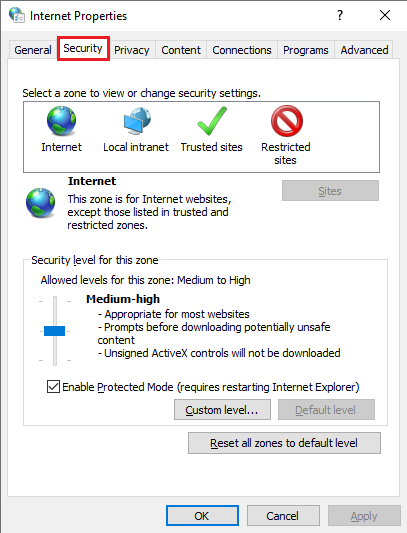
Step #3: Go to the “Security” tab and change the security level to “medium.”
Step #4: Similarly, click on the Privacy tab and set your privacy level to “medium.”
Now, finally, reload the page to check whether the issue has been eliminated or not.
10. Activate all TLS/SSL Versions
This is the last method that you can use to fix this issue if all other methods fail.
However, activating all TLS/SSL versions means that even the sites with outdated or insecure SSL protocols will also get loaded, which can be hazardous in some cases. That’s why this method is not particularly recommended.
However, if all other measures fail, then you can try this one out as your last resort.
Here is the way to activate all TLS/SSL versions:
Step #1: Open the Advanced Settings of Chrome and then select “System.”
Step #2: Select “Open Proxy Settings.”
Step #3: Open the “Advanced” tab
Step #4: Go to “Security”
Step #5: Check the boxes of all TLS/SSL Versions.
Now, restart the browser to check whether the issue is fixed or not.
Final Thought for ERR_SSL_PROTOCOL_ERROR
I hope all these above-mentioned solutions will help you to fix the ERR_SSL_Protocol_Error on your Google Chrome browser.
Start with the first method and then move on to the next one. If all else fails, you can try activating all the TLS/SSL versions, but as mentioned in the last point itself, it’s better to avoid this solution if possible.
Related Post:

